Behind the Scenes: Printing
I print my own work. And I do it for two reasons. 1) The turnaround is much faster because I am not waiting on a vendor to do their part, and then for shipping of the final product. My timing from photo session to final presentation of printed photographs is right around 1 week. And 2) I can control every part of the process.
While it may not seem like a big deal, controlling the process is everything to me. It guarantees that a certain standard is not only met, but maintained consistently, every single time. There are specific steps that I follow and this Blog post is all about the process of printing photographs for my clients, from start to finish.

My home work area. It was important to have a standing-height desk so I can work with photographs.. and the perfect spot for the printer is right behind it.
Preparing Images for Print
After editing and retouching, every image is individually prepared for printing. I use Lightroom (which is a professional photo editing software by Adobe) to create several virtual copies of the finished photograph. Two versions get exported for the client (digital jpeg files, in color and black and white) to accompany the print. The third version, with its own adjustments, is the one that gets printed.

I use Lightroom on my laptop to do basic edits and to organize the photographs from the session. All the retouching is done by hand in Photoshop.
Now, you might be thinking.. why would you need to adjust each portrait individually for printing? That seems unnecessary, right? When we send pictures to popular printing websites or use a printing kiosk, we don’t do any of that (ok, to be fair, sometimes people hit that ‘auto enhance’ button, but that’s hardly the same thing).
When printing professionally, I have to account for the paper (each paper has its own unique properties) and the printer (each printer, once again, has its own type of ink and its own way of rendering colors). If I didn’t adjust my photographs, they would print too dark (because when I work on them and view them, I use a computer screen which is back-lit). And the blacks would be too light (as in, gray), since I’m printing on a matte fine art paper. I also have to watch my highlights and blacks because while adjusting, I don’t want to lose those details by pushing too far.
If all of this sounds overly complicated, I understand. The one thing to remember is that this process takes some time, lots of care, and attention to detail.. and that it’s an essential step to making sure images look good when I print them.

Once images are printed, they are cut down to size (notice the white border, which is great for handling the edges of the print).
Using Museum-Quality Materials
The next part worth mentioning is the actual materials that are used in the printing process. Most people are familiar with the cheap printing that is ubiquitous nowadays. You can go to a pharmacy (of all places!) and come out with a handful of printed photographs for less than a dollar.

Me, going through the steps of preparing prints. 1. Cutting them down to size, 2. Matting them, and 3. Placing them into a presentation box.
While photographic printing has become more and more accessible, the general quality has consistently gone down to match the falling prices that came with it. Currently, using pigment-based inks produces the longest lasting print. Using 100% cotton, completely acid- and lignin-free papers, produces a longer lasting print. It’s also the most expensive way to print a photograph.. which is why you don’t really see as an option it at your local Costco.
These are the materials you see used at art galleries and museums. Most professional photo labs, if they offer the option at all, have a very small subset of their business dedicated to truly archival printing on fine art papers. Once again, because it’s expensive. Most photographers print their work on the popular Kodak and Fuji papers that are cheaper, using the chromogenic process, which is more widely available - the problem, of course, is shelf life, which has been disputed and proven to be much shorter than companies claim.
True archival printing is expensive because of the high cost of the materials. I get asked all the time “How are these prints different?”.. because while they do look different than standard prints, often simply seeing the difference doesn’t explain the actual benefit behind it. Museum-quality prints last much longer without fading or yellowing. They are not for everyday snapshots, but for prints you’d like to pass down to your children. Longevity, color rendering, and the special coating that is part of the paper make the prints very different in the long run.
Printing to Archival Standards
Producing the print is a process that requires specific care and monitoring of the environment. The main goal is to not compromise the print in any way during the printing process.

The printer, with a humidity/temperature monitor always close by.
This means, monitoring and constantly maintaining specific humidity and temperature levels when printing. While the printer and paper can technically work just fine up to 90+% humidity, I don’t print unless I’m in that 40-60% humidity range. Temperature, as well, is kept under 70°F. This goes for any time I’m working with the photographs out in the open. Otherwise, everything is stored (usually wrapped and packaged for extra protection) in a dark hallway closet that stays both cool and dry year round.
The other part, is wearing white cotton gloves. This is important because finger oils will react with the paper and will damage the print in the long term. Once again, I want every print to be in pristine archival condition before it gets to my client.

Each photograph is inspected for imperfections before matting.. and if it's not absolutely perfect, I re-print.
Matting & Presentation
So, after preparing the files and printing the images, I take the time to inspect each one. Sometimes a little spot will end up on the print. Sometimes the color or brightness is slightly off. And if the print isn’t the best representation of that photograph, I re-print, right then and there (which is one of the other really great benefits of printing my own work).

Close up of my archival museum-quality 5x7" print.
I then cut every photo down to the correct size (they are, in fact, slightly larger than 5x7” as I keep a white border around the image) and carefully mat them in an 8x10” white mat. The matting is important because you should never touch the actual print. The mat allows you to safely handle and admire the photograph without worrying about damaging it. And I absolutely love the mats! They beautifully frame the photograph and truly elevate the presentation.. which is how every print should live. You never have to worry about bending the photograph and they easily fit into any 8x10” frame with very little work.
I also include a box to safely store the photographs (sturdy recycled paper box for individual print purchases or a gorgeous handmade Japanese-silk box that is included with the top two Collections) and a photo stand to display them. The storage materials are all acid-free and allow you to keep your images safe over the long haul. The whole point of this, after all, is so your children have beautiful photographs from their childhood!
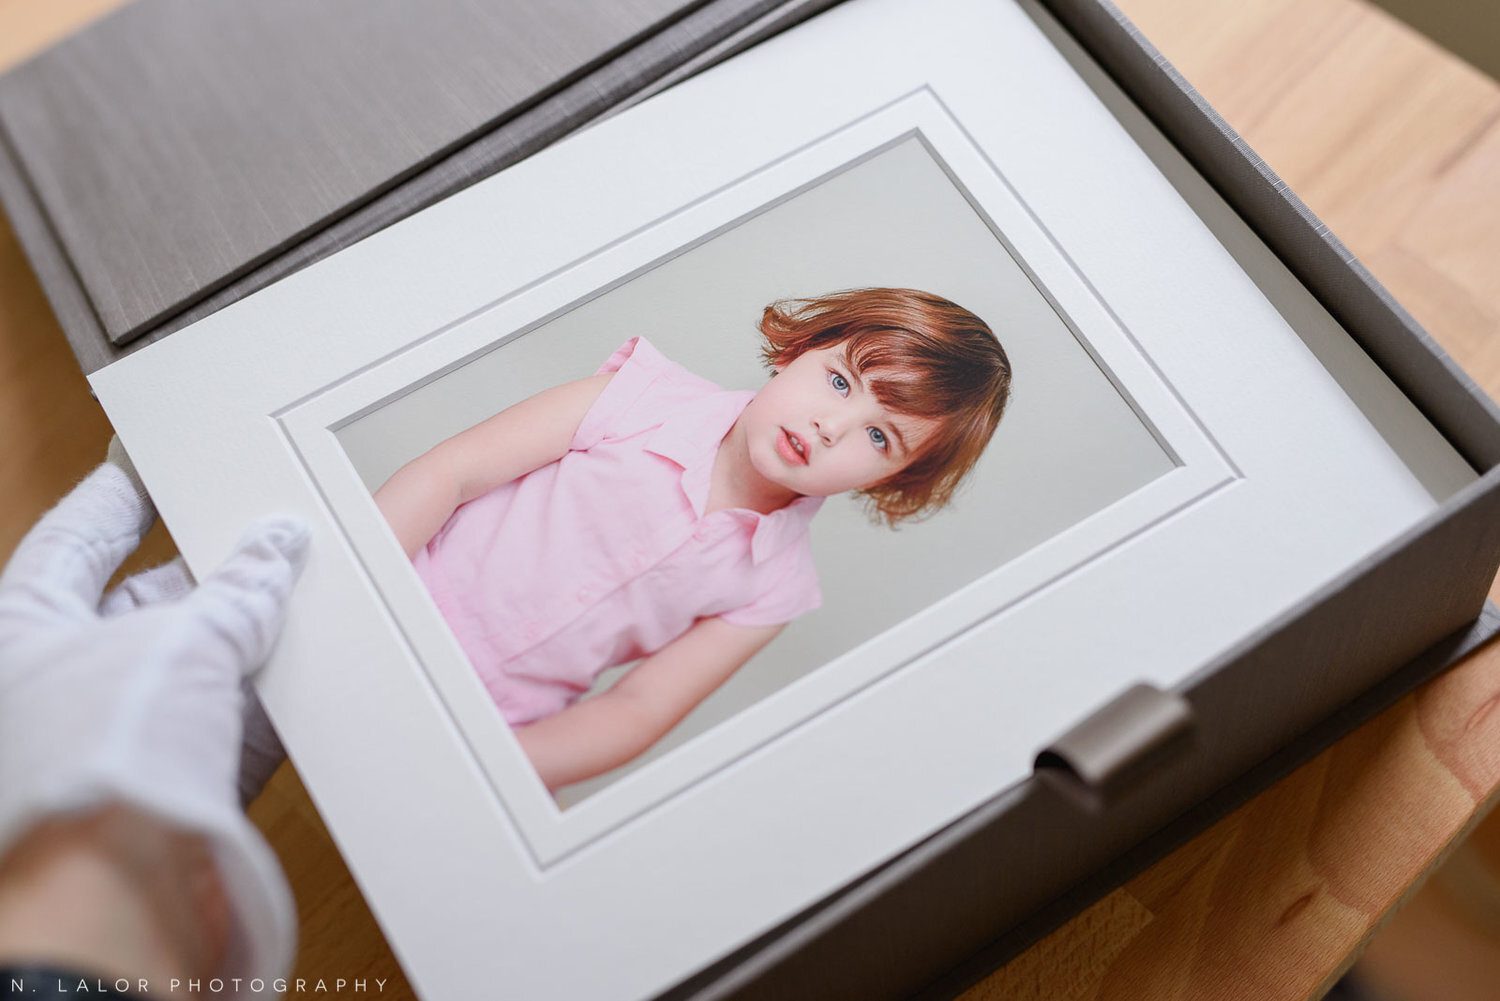
The final step, placing finished photograph into a handmade heirloom box for the client.
And that’s it!
That process, from start to finish, typically takes about one working day. I will admit that sending images to a photo lab and having them take care of the printing is both faster and cheaper, but does NOT produce the same quality or result. And when I say that you really can’t get this same printing anywhere else, I truly mean it.