Creating a Family Photo Gallery Wall
One of the things I’ve heard a few times from my Clients is the desire to create a photo gallery wall in their home. Now, there’s a very good reason why this project is both desirable and challenging at the same time. The mere task is daunting! Not to mention having the design, layout, plan, and implement the entire thing.
The first step to creating a gallery wall is deciding what you’d like it to look like! And I feel that there are a couple of select approaches you can take..
One Style, Many Sizes
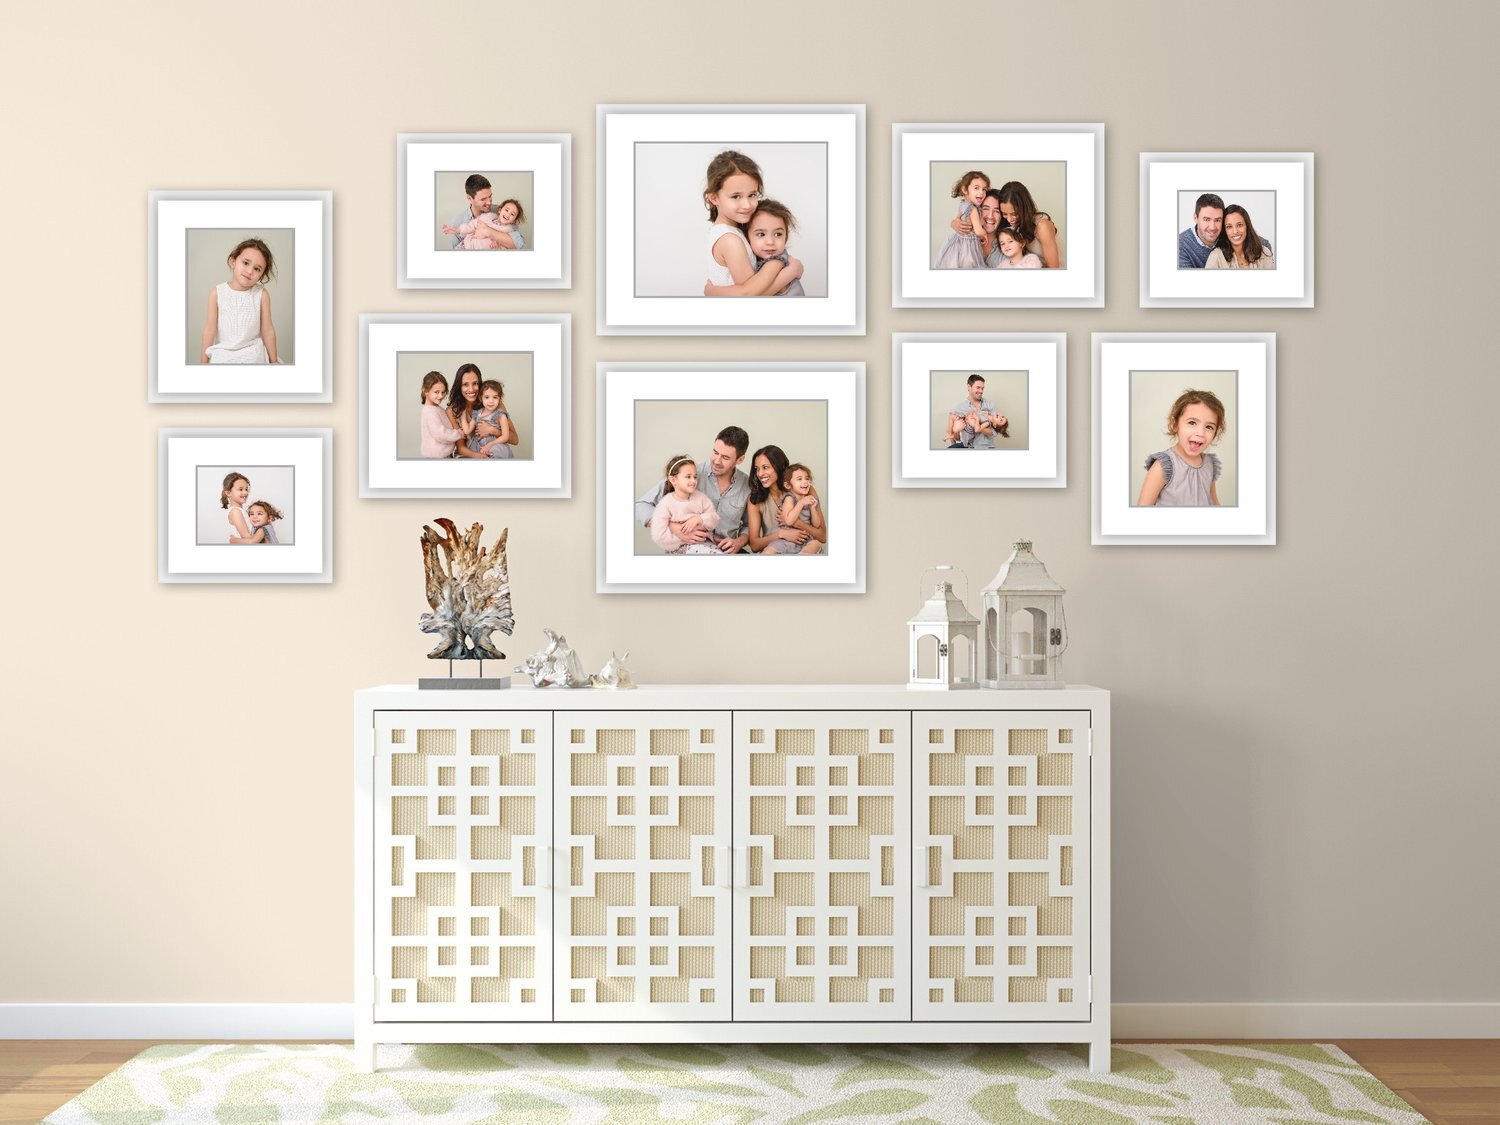
If your home already has a specific look, you can stick to a single style of frame and vary the sizes to create interest and flow. The benefit of this approach is that you can create an interesting composition but still keep a cohesive look. You can also draw attention to the bigger pieces while still celebrating the smaller moments. This works really well if you want to add photographs over the years, too.
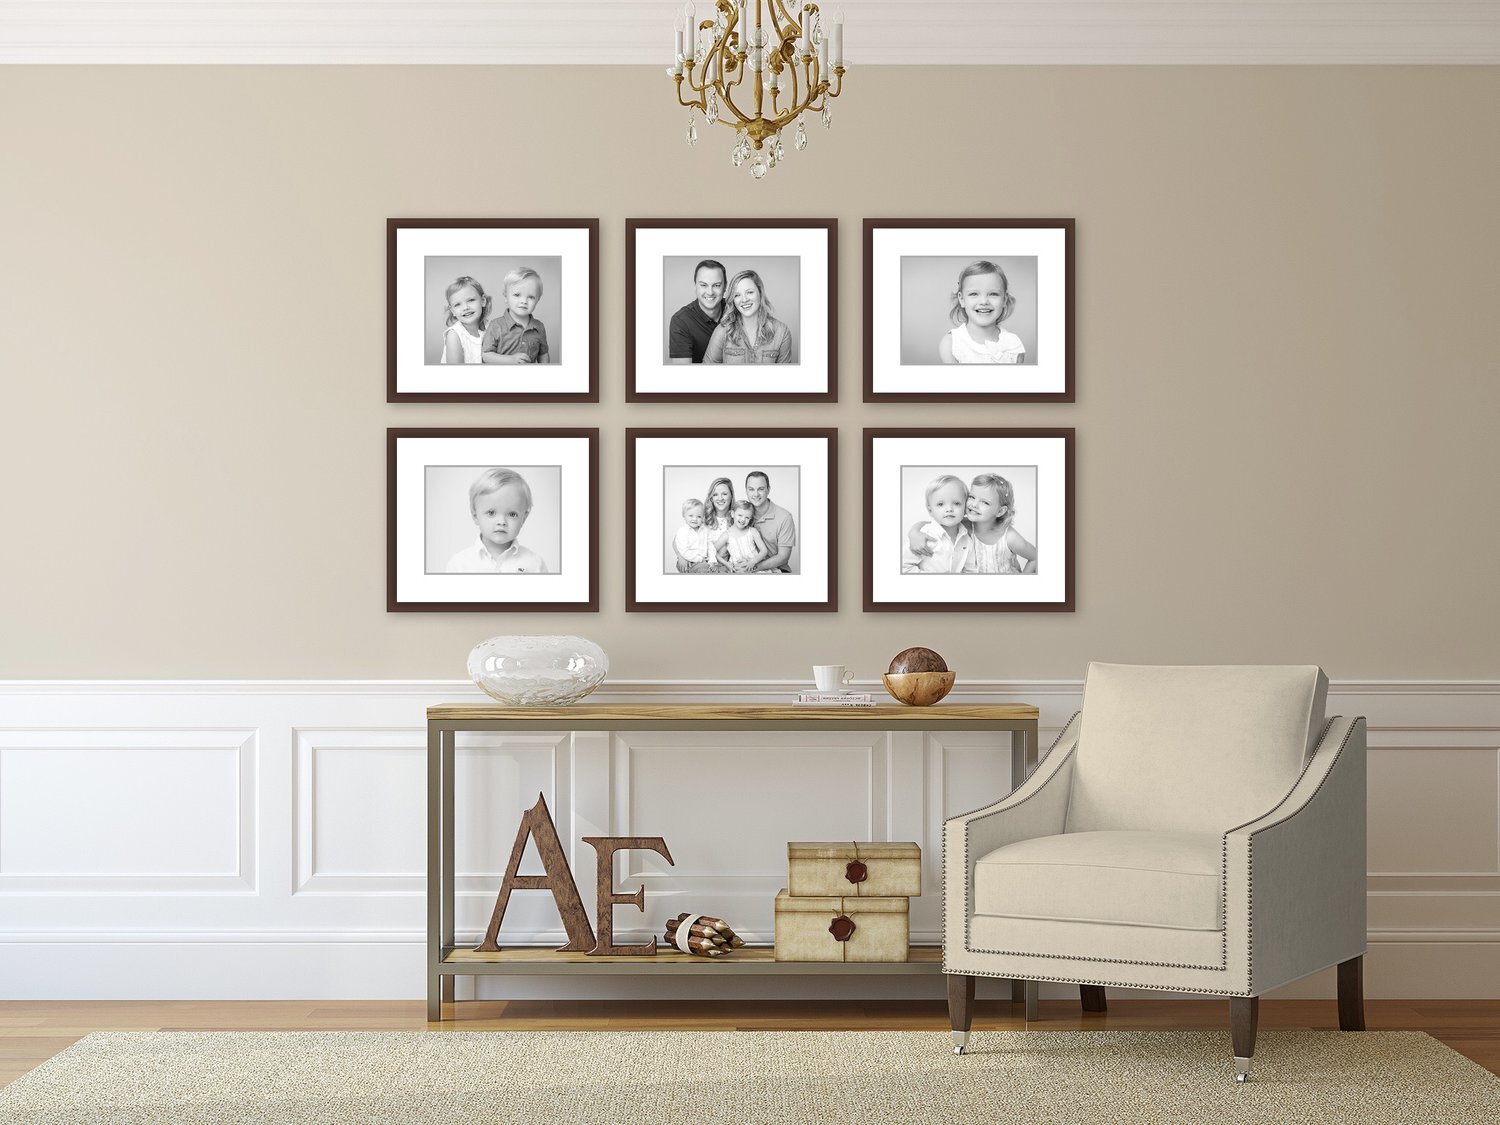
A Uniform Grid
This is possibly the easiest to design and implement, because the layout will be dictated by the space and frame size. Placing frames on a grid layout gives a great uniformity to the gallery wall, but it also becomes very important to keep the photographs in the frames consistent as well. Make sure to line everything up perfectly square and secure frames to the wall in a way that doesn’t allow movement, because any slight shake (like from foot traffic) will slowly make your uniform wall look askew.

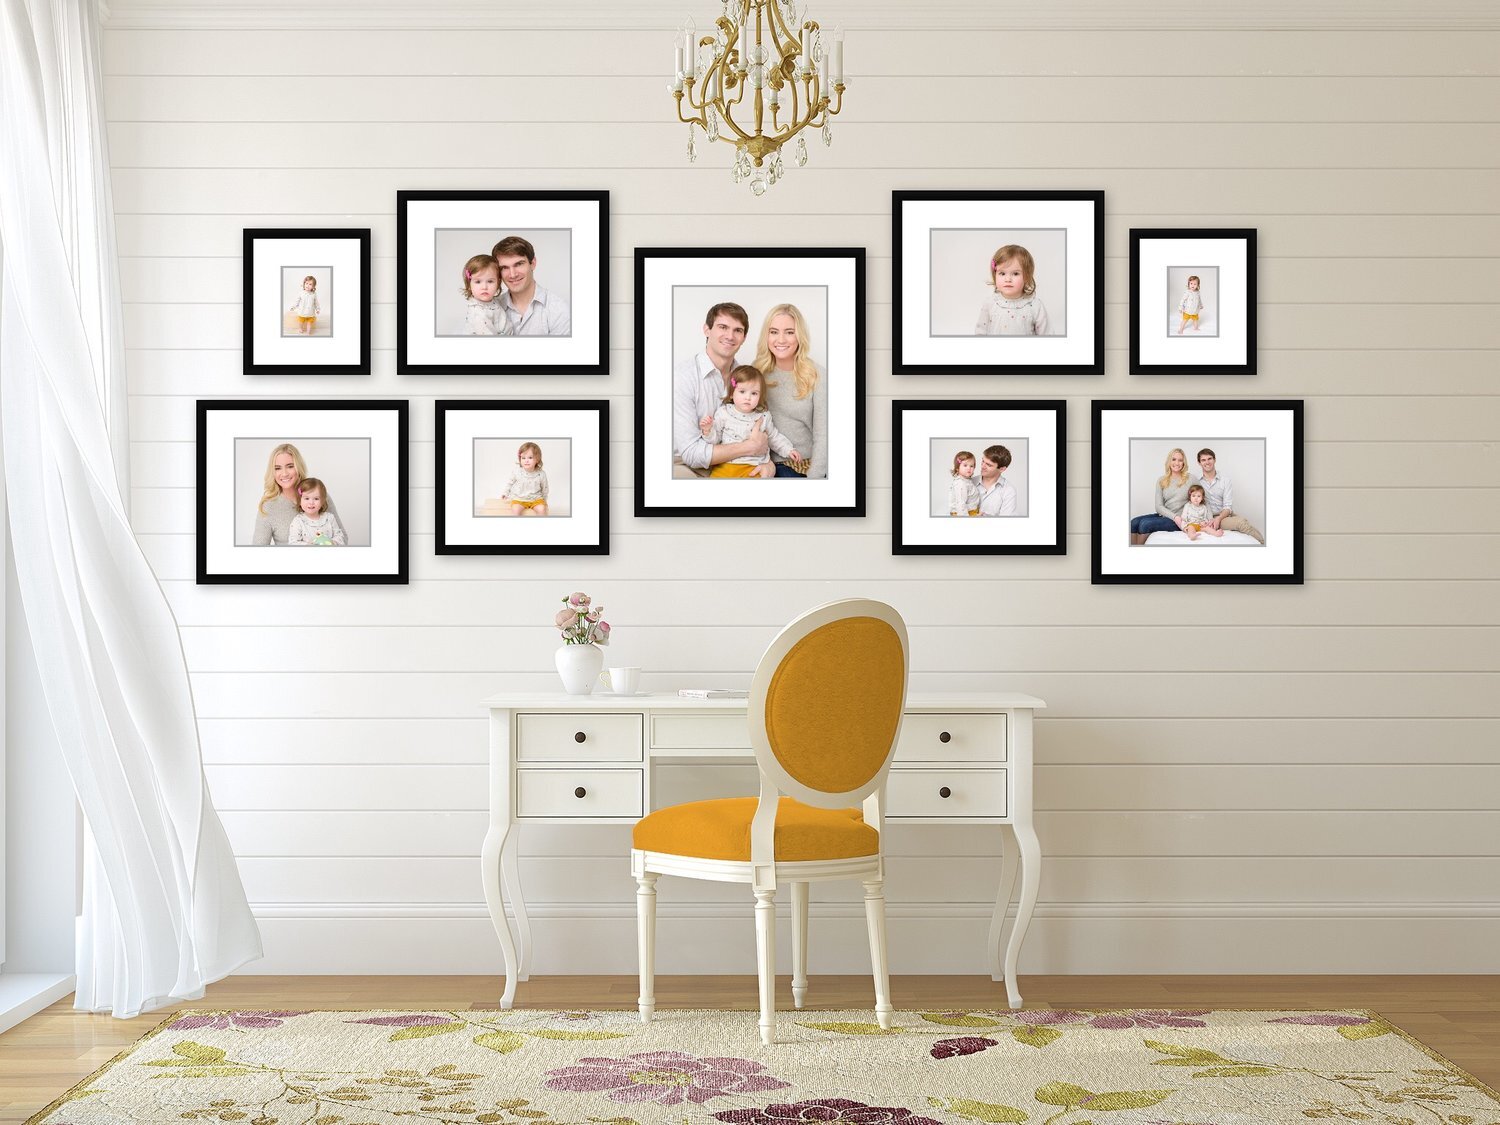
Mix-and-Match
You can also mix and match frame styles if your home has a more eclectic look. You still need a cohesive element, which can be the type of photographs you use (for instance, all black and white images) or the primary feel throughout (light and airy, ornate, specific color, etc). This is probably the best approach if you don’t want to create your gallery wall all in one go, but add on to it as years progress.
An Eclectic Approach
And if you want to go outside the “box”, you can mix not only frame styles and sizes, but also include different types of artwork and objects in your gallery wall. This takes more time to plan and design, but if you’re a fan of highly personalized artwork, this could work really well. You will want to create this gallery wall all at once to make sure everything goes well together, lay it out on a large piece of paper, and map/trace out every piece before you start making holes in your wall. It is kind of ironic that the most free-form look requires the most planning and forethought!
Best spots for a photo gallery wall
You might already have the perfect spot in mind for a gallery wall in your home. Or maybe you’re not sure where you’d put one? A photo gallery can fit just about anywhere, but it does look best in specific areas of the home…
A long hallway. This is kind of the primary use of a gallery wall: to fill up hallway space with something interesting and pretty for all those times you pass through it. One thing to keep in mind is the width of the space, as that will determine how large you should have your photographs (large images need more space to step back and appreciate them)
Above the couch. Instead of one or two large artworks above such a prominent piece of furniture, you can do an interesting arrangement of frames. This will take up a good portion of that blank space and will make the whole area feel cozy.
Around the TV. Sometimes creating a bit of distraction around that large television screen makes it less of a black box in the middle of a wall. Placing frames around the white space makes it more of a focal point (but in a good way) and works best when the TV is hung on the wall directly.
Above a console table. A smaller gallery wall design works really well to add interest in an entryway and fills up the empty wall space.
In the office! This is such an overlooked area because we approach it as a space purely dedicated to work, but imagine how much better working will be when you’re looking at your family’s smiling faces from your computer desk!
Installing a gallery wall
This is the fun part.. or rather, the part everyone dreads. The key here is to plan everything out in advance. Plan out the sizes of the frames. Use a large piece of paper to trace every frame and cut out a template for placement. You can either arrange your frames directly unto the paper, or create the cutouts first and arrange directly on the wall. Things get a bit complicated if you’re dealing with hanging wires on the back of the frames, as those will determine where to place your hanging nails. There are many online tutorials that do a great job of explaining this process.. but the main point is, take your time to really map out every piece.
And if you know you want a gallery wall, but would rather build it up over the years instead of all at once, you still need to plan the whole thing in advance. Once you know what the final version of your wall will look like, you can start putting up frames in pre-determined spots and fill in the rest over the years. This is the best way to avoid having the move things around and patching up walls to accommodate new artwork.

Getting Started
It’s funny that “getting started” is the last part of this post.. and is probably also the hardest. The best way to start is..
Determine the style you want. Choose from one of the above styles or browse photos on Pinterest to see what you like.
Pick a spot. Walk around your home and look at the empty walls to figure out the best place for your wall. If you’d like it to be a bit more private, pick a spot upstairs near the bedrooms, and if you want it on full display, pick the dining room, entryway, or living areas.
Map it out. Shop for frames (plus any other objects you’d like to include) and plan out the layout on the floor or a large table. Transfer this layout unto a large piece of paper or put up paper templates of the frames directly on the wall. Since this is a somewhat permanent installation, leave the template for a day or two to give yourself some time to change your mind before things go up.
Put up the frames! Use the template, nails, and a hammer to install the artwork.. or have someone else do it for you (there’s no shame in that!).
And if you’re really lost and having a hard time, you can definitely work with an interior designer or a photographer (Hi there!) for your photo gallery wall! We often have special software to map everything out on your wall and pre-visualize the final look for you. So you definitely don’t have to do it alone! Check out my Family and Baby pages for product and photo session info.. and click “Book Now” to get started with reserving your photo session (and yes, custom art designs are always included free of charge!).