Tutorial: Natural Makeup for Portraits (with Haus of Pretty)
Makeup is a really important step in getting ready for your portrait session. And since I personally am not well-versed in makeup, I teamed up with Kelsey Morey, the owner of Haus of Pretty in Westport, Connecticut to bring you an easy do-it-yourself guide to getting camera-ready for your photoshoot.
I often bring Kelsey in for hair & makeup application for photoshoots because she’s so incredibly skilled in this field (she is my first call when the session is booked). It’s important that the person who’s doing the makeup knows how to apply it specifically for a portrait session (vs. going out in real life)… because things definitely look different on camera.
And that takes special knowledge that most people don’t have. It doesn’t mean that you can’t do your makeup yourself, as long as you’re aware of a few key points and follow Kelsey’s tips for photo-ready makeup application below...

Step 1: Moisturize the skin
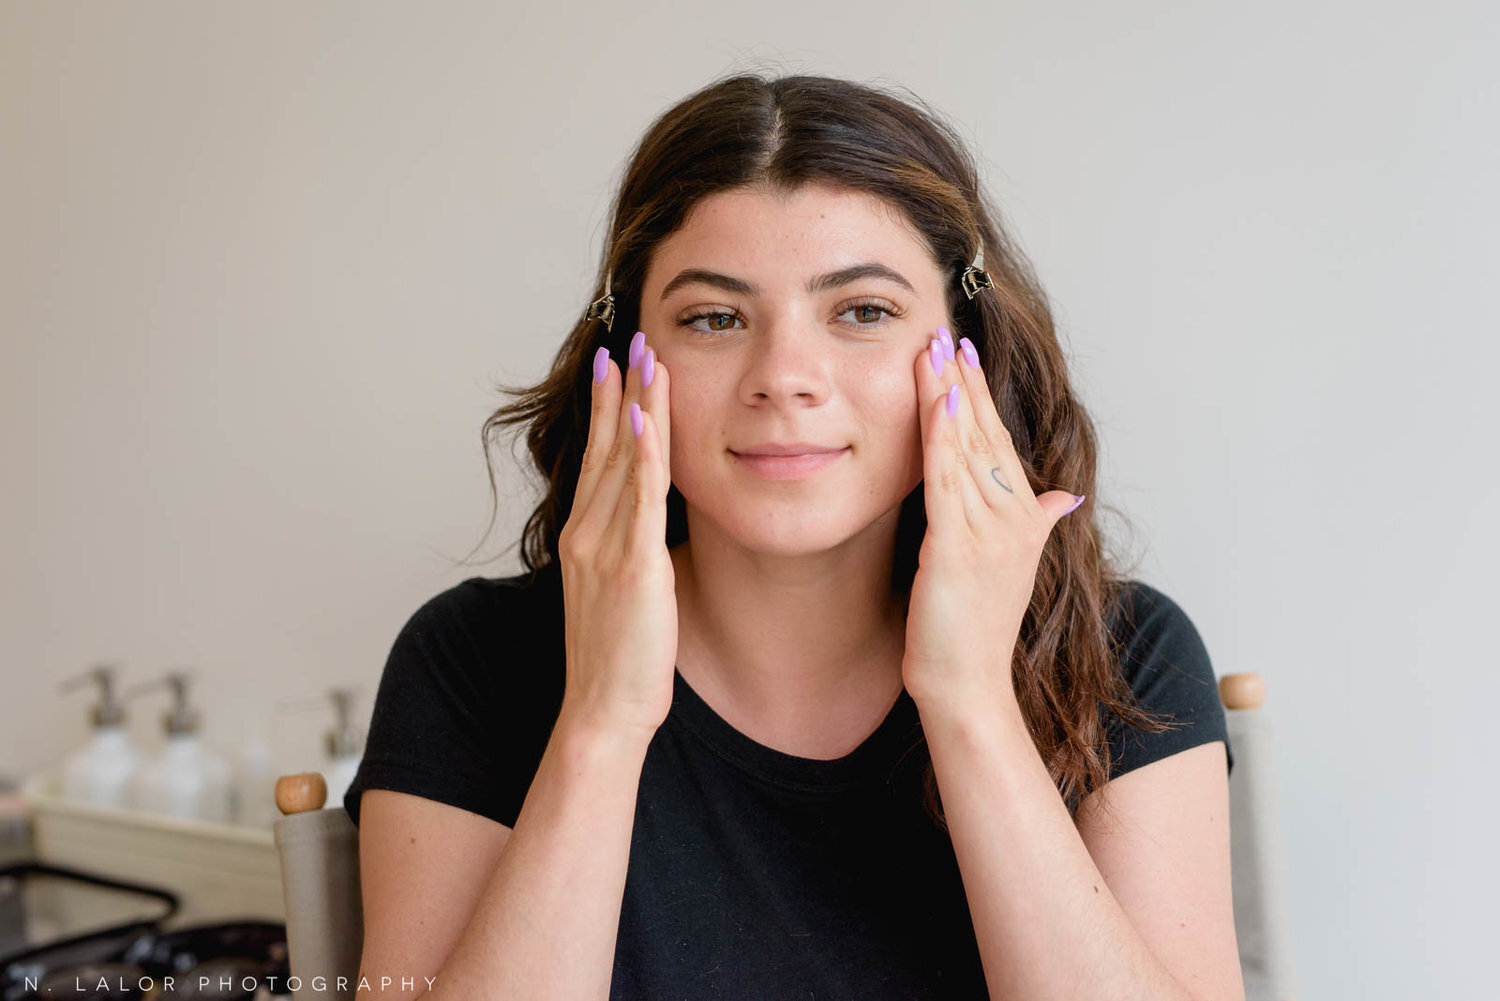
One of the most important steps to looking good for your photoshoot is properly moisturizing your skin, both the night before and the morning of your session. You can use the moisturizer you already have in your makeup arsenal for the night (and don’t forget your kids, they need well hydrated skin too!). For the morning, Kelsey recommends BB cream as the first step to getting your face ready for makeup application. BB stands for ‘blemish balm’ and this cream helps even out the skin tone so you start with a really great base. One thing to avoid during this time is sunscreen, which can often scatter light rays in unpredictable ways in photographs.
Step 2: Apply Foundation

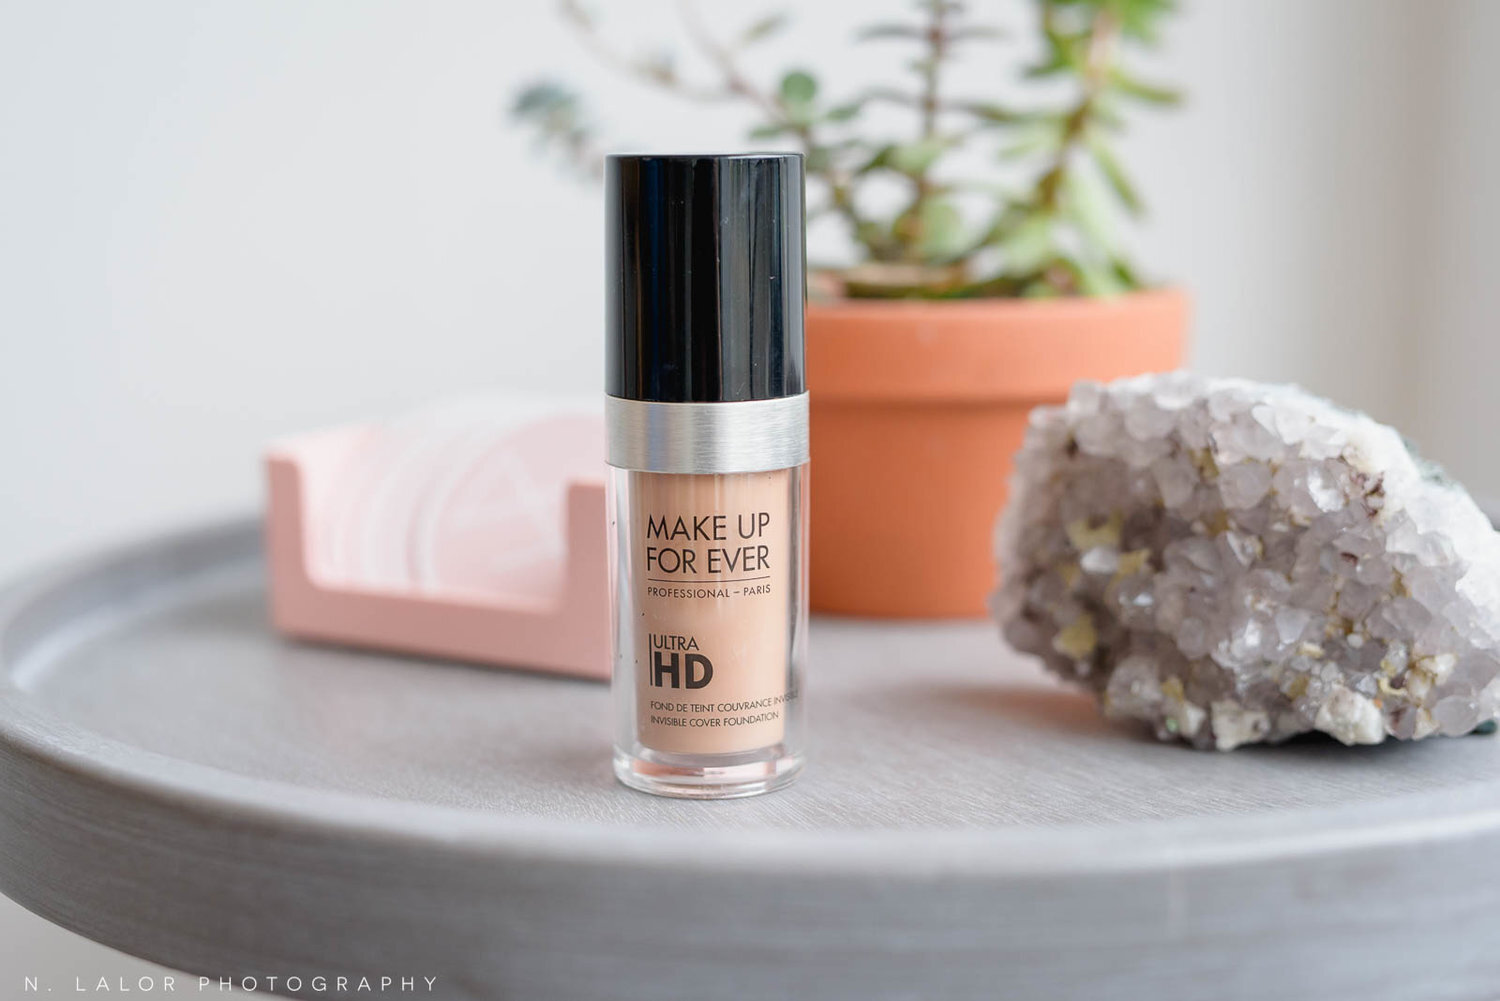
Apply foundation lightly to your face to even things out and make sure to blend it well into your neck, using a large brush or your fingers. You don’t need a lot. The point isn’t to cover everything (if you can no longer see your freckles, you went too far), but to smooth out your skin tone for an even look. Make sure to use matte foundation and avoid anything that is “dewy” or has shimmery glow build into it. This is really important for portraits because while those products might look good in real life, they will make your face look shiny/greasy in pictures.
Kelsey recommends: Make Up For Ever Ultra HD foundation, apply with your fingers or a large brush.
Step 3: The Eyes
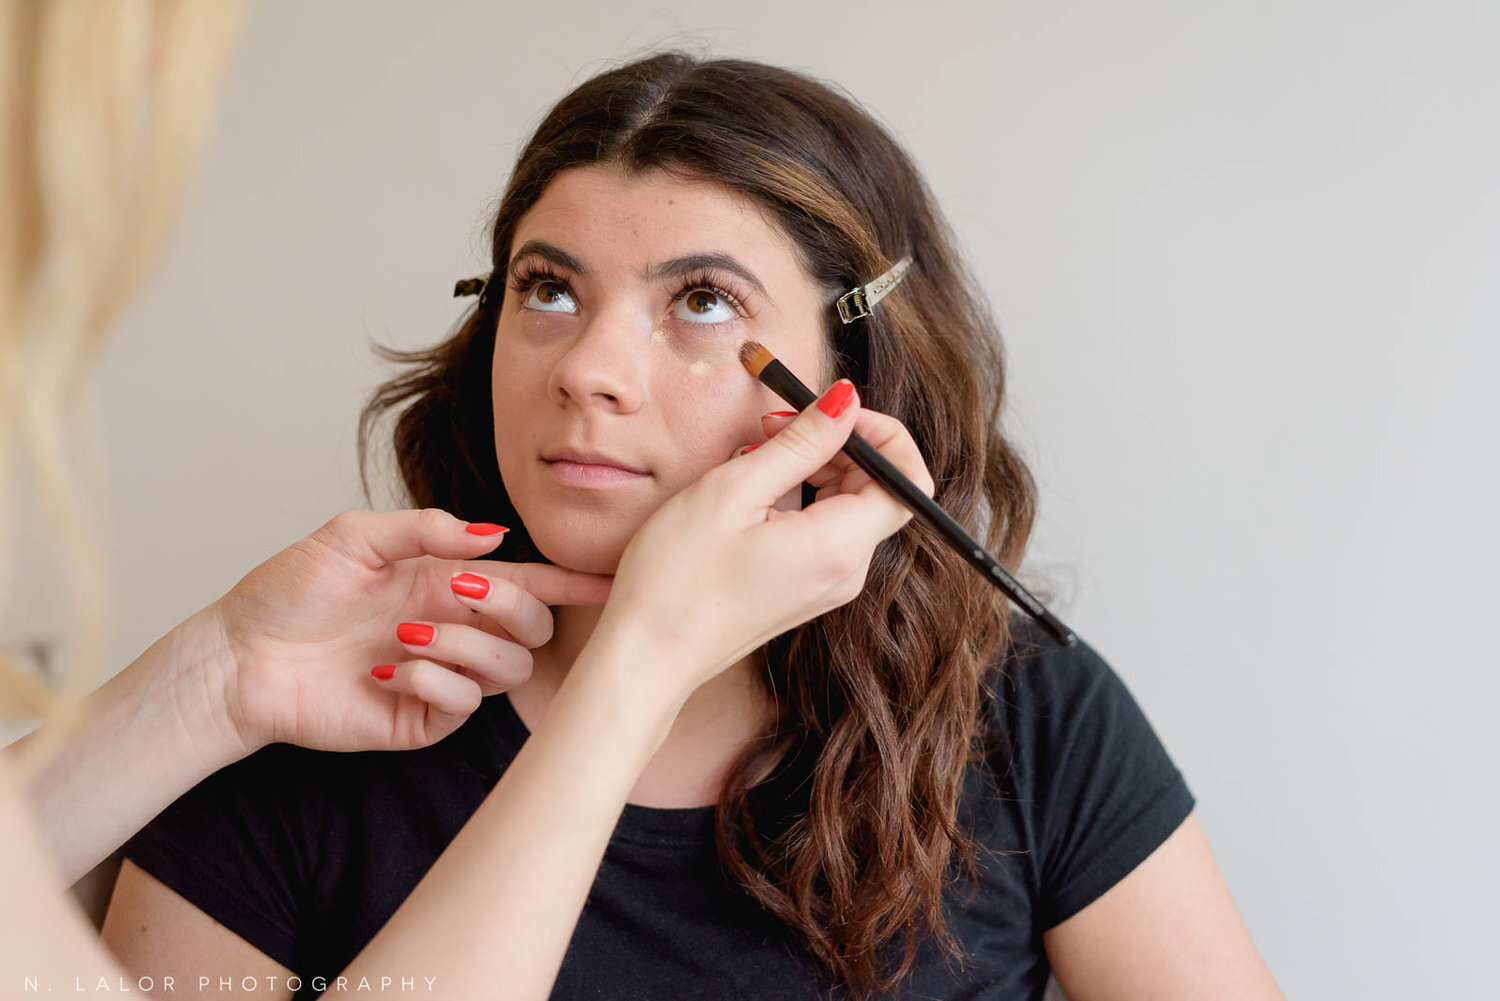

Under-eye coverup is important because we all have dark circles under our eyes. Kelsey dabs three small dots of under eye concealer for each eye and blends with a small brush. You can also use your fingers to do this, making sure to blend everything in well. That little bit of highlighting under the eye will make you look well-rested and more vibrant, which we all could use nowadays!
Kelsey recommends: Bye Bye Under Eye Illumination Concealer, apply with your fingers or a small brush.

You don’t need to go crazy with eye shadow either. Stick with neutral colors and don’t bother with eye liner (it’s too easy to mess up). You can go darker near the lash-line to mimic the effect of liner and lighter as you go up, using a small brush to blend everything in. One good trick is if we have several wardrobe changes (and we usually do) you can darken your eye shadow throughout the session to create a more dramatic look to go with a dressier outfit and build on your already created base. Kelsey also suggests avoiding shimmery eye shadows as they’re harder to work with and scatter light, similar to sunscreen loaded products.
Kelsey recommends investing in a good neutral set of eye shadow and a small brush for application.
Step 4: Brows and Lashes
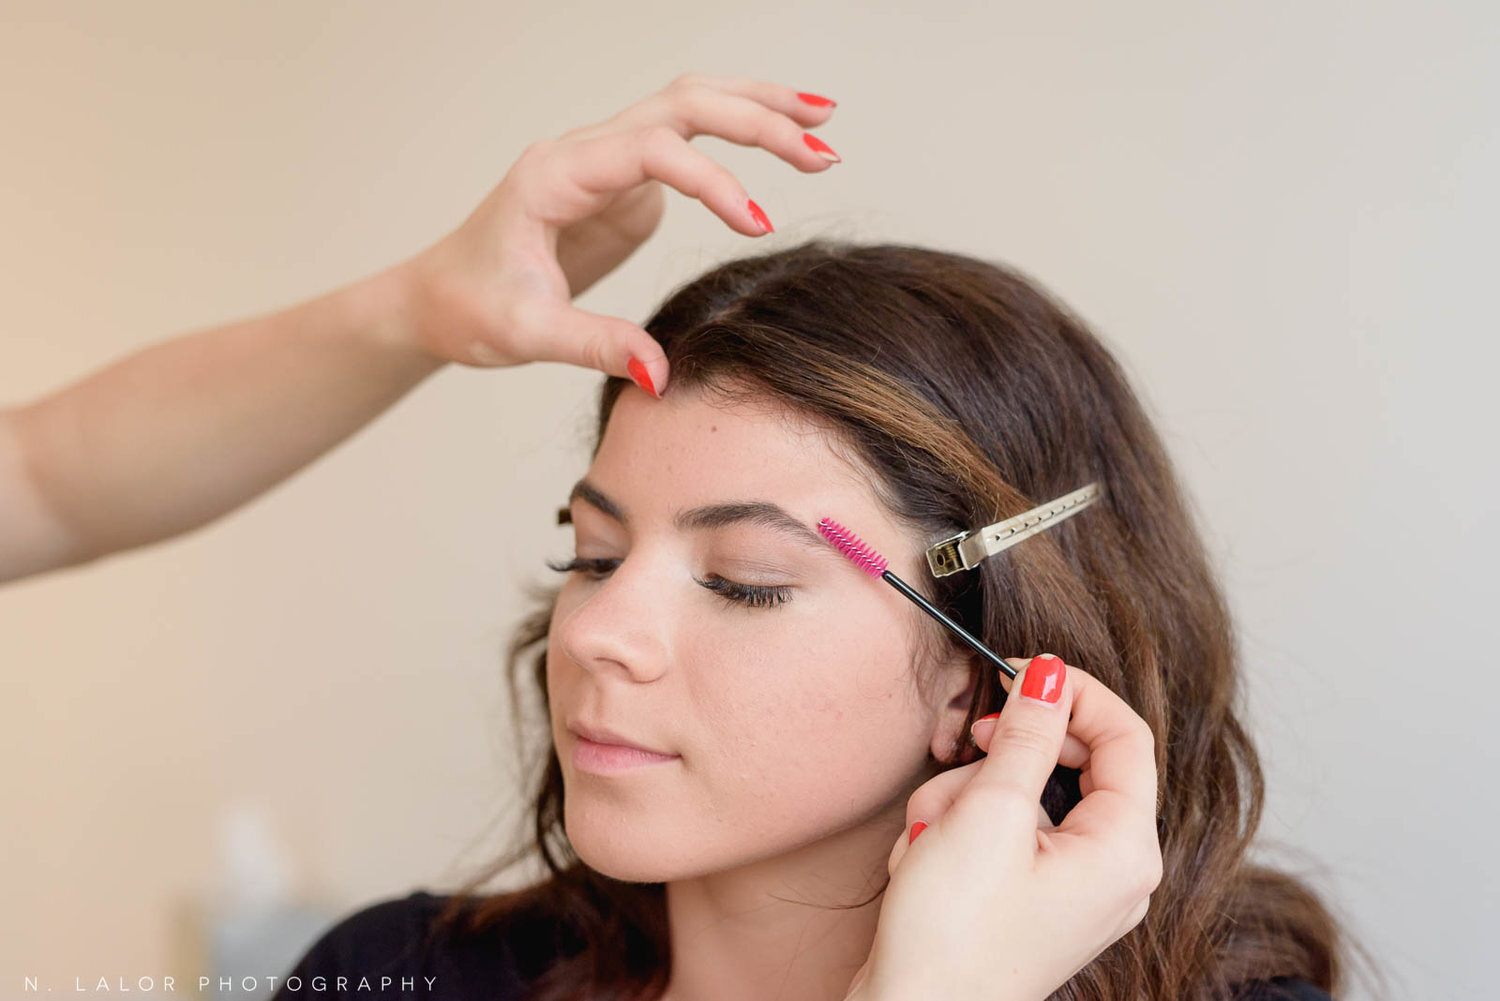

Eyebrow maintenance is important, but even if it’s not part of your beauty routine, taking a few moments to simply brush your eye brows will neaten them up significantly. Kelsey uses a clean mascara brush to follow the brow line and gently brushes up to create a good shape. For mascara application, most brands will work well. Select one that’s volumizing and lengthening, in black, and apply using even small strokes to achieve a natural result. And if you get clumps on your lashes, use a clean brush to work them out (Kelsey suggests cleaning and keeping your used-up mascara brushes for this exact reason).
Kelsey recommends: Too Faced Better Than Sex Mascara, apply with a clean mascara brush to avoid clumping.
Step 5: Blush


Blush can be super simple as well. Kelsey uses an angled brush to apply blush to the apples of the cheeks in a sweeping motion. It’s important to not go too far, and to avoid contouring underneath the cheekbones. Depth and dimension will be created with my expert portrait lighting, so it’s not necessary to follow the current trend of creating that dimensionality with makeup. It’s also way too easy to take it too far. When Kelsey works with clients she will do a bit of contouring based on their specific face shape, which takes a lot of knowledge and practice to accomplish properly.. so my recommendation is to always leave that part to the professionals.
Kelsey recommends: Glossier Cloud Paint, for easy application with you fingers.
Step 6: The Lips
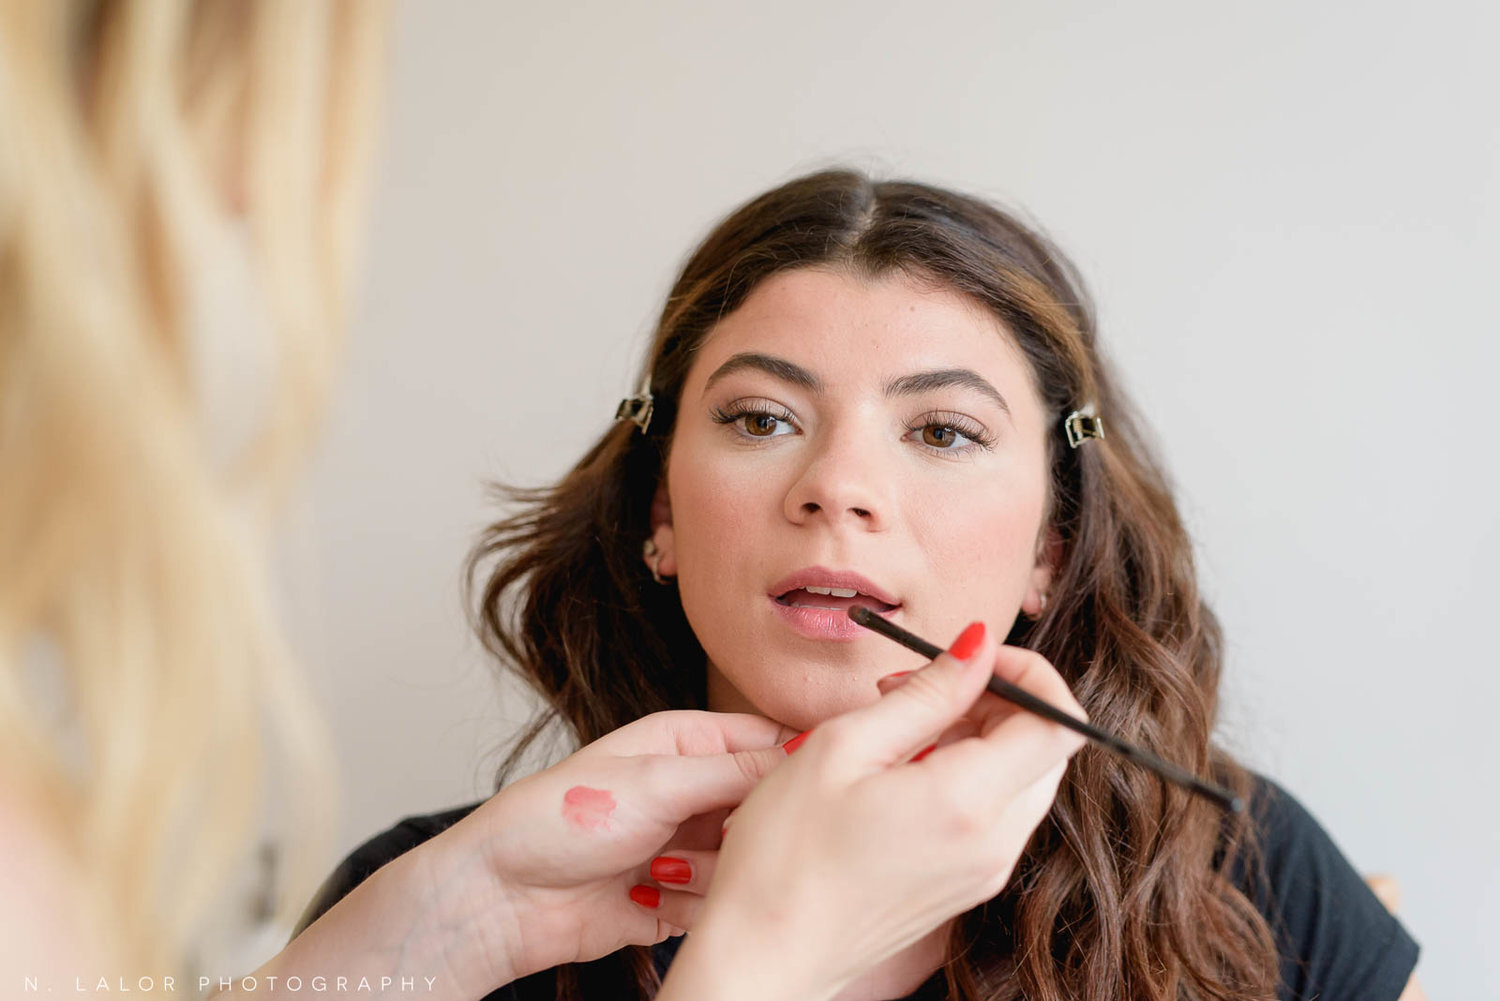


Lips is one of the last steps that really pulls everything together. You can use lipstick or lip gloss, or a combination of the two (layer the gloss on top for a hint of shine). One of the most important things here is to bring whatever you use with you to the session as you’ll probably have to re-apply several times during the photoshoot. Please don’t use a lip-liner, it’s usually not necessary and often doesn’t look great on camera unless applied by a professional. On the other hand, a lip conditioner the night before or as a base for your lipstick is a great idea. Feel free to bring a variety of shades so we can do camera-tests (lip color often looks different in camera) and change up your look throughout the session.
Kelsey recommends: MAC lipsticks and Alba Botanica TerraGloss Shimmering Lip Gloss.
Step 7: Set & All Done!


Setting powder or setting spray is a great last step and prevents your foundation from getting creases. Powder should be applied with a brush, with a light hand. The setting spray is much easier to use and one spritz is all that’s needed. And that’s it! You should be done and camera ready at this point. And remember to bring anything you think you might need to reapply with you to the Studio.
Kelsey recommends: MAC Prep + Prime setting spray.
Makeup doesn’t have to be scary and complicated, which is why I love working with Kelsey of Haus of Pretty so much. Don’t layer things on to the point where you can no longer see your true self.. it’s not about hiding YOU. Makeup should enhance what’s already there, smooth out little imperfections, and add a bit of color. It’s a little bit of enhancement we can all use for being in front of the camera, and it makes all the difference.

And A few important things to remember:
Avoid shimmer in your foundation.
Don’t wear sunscreen.
Maintain your brows for best look.
Invest in high-quality products for a longer lasting and more natural looking finish.
Keep things simple.
Always bring makeup with you for touchups.
Utilize eye shadow and lip color for different looks during the session.
If in doubt, hire a professional who knows how to do makeup application for photoshoots.